Poudeglac Documentation
- Ghost version: 5.x
First of all a huge thanks for purchasing this theme! If you have any questions that are not answered here, please feel free to contact us via email.
Theme Installation
To install Royce on your Ghost site, follow the steps:
- Log into the admin section of your Ghost site:
yoursite.com/ghost. - Go to Settings → Design and click on Change theme located at the bottom of the left hand column.
- Click on Upload theme.
- Drag-and-drop or click and locate the zip file for your theme.
- Once it is uploaded, click on either Activate to activate the theme immediately or Close if you want to activate it later on.
Getting Started
Uploading a Favicon
To add a favicon:
- Navigate to Settings → Design in your Ghost admin.
- Expand the Brand section.
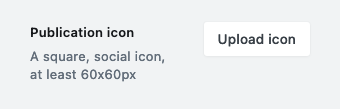
- Click Upload icon next to Publication icon.
- Save changes.
Uploading a Publication Logo
To add a logo:
- Navigate to Settings → Design in your Ghost admin.
- Expand the Brand section.
- Click Upload logo next to Publication logo.
- Save changes.
![]()
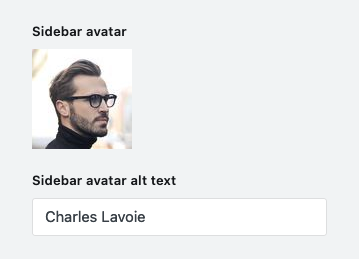
Instead of publication logo you can display your profile image. To add a profile image:
- Navigate to Settings → Design in your Ghost admin.
- Expand the Site-wide section.
- Upload the Sidebar avatar image.
- Fill the Sidebar avatar alt text field.
- Save changes.
If neither publication logo nor profile image was added, the theme shows the site title.
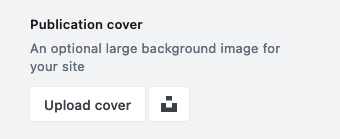
Uploading a Publication Cover
The publication cover image is displayed in the background of the error pages.
To add a publication cover:
- Navigate to Settings → Design in your Ghost admin.
- Expand the Brand section.
- Click Upload logo next to Publication logo.
- Save changes.
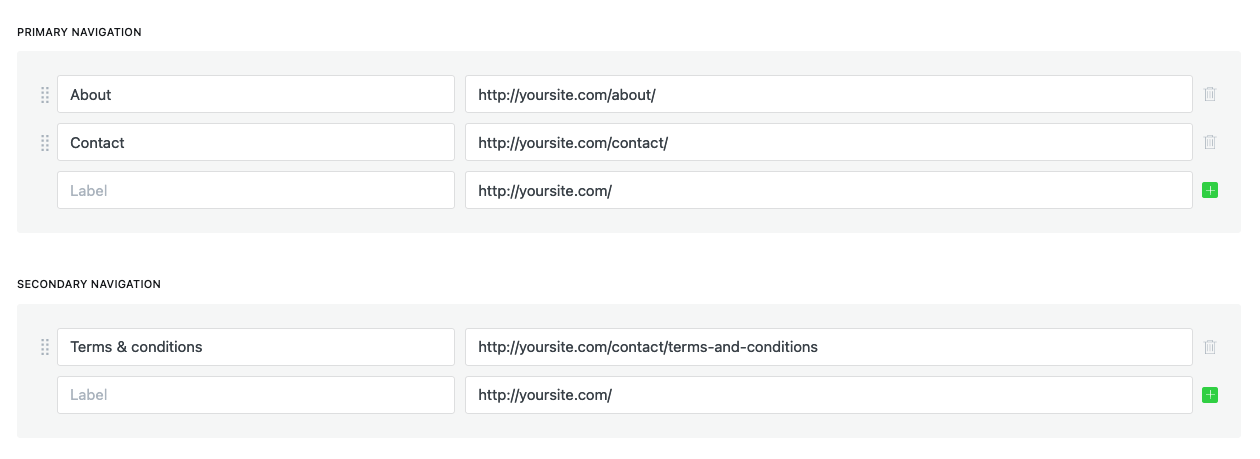
Adding Navigation
The theme supports primary and secondary navigation. Primary navigation is displayed in the sidebar, while the secondary navigation is displayed in the site footer.
To set up primary and secondary navigation:
- Go to Settings → Navigation in your Ghost admin.
- Add your navigation items by entering a page name in the label field and a destination URL in the URL field.
- Once finished, click Save.
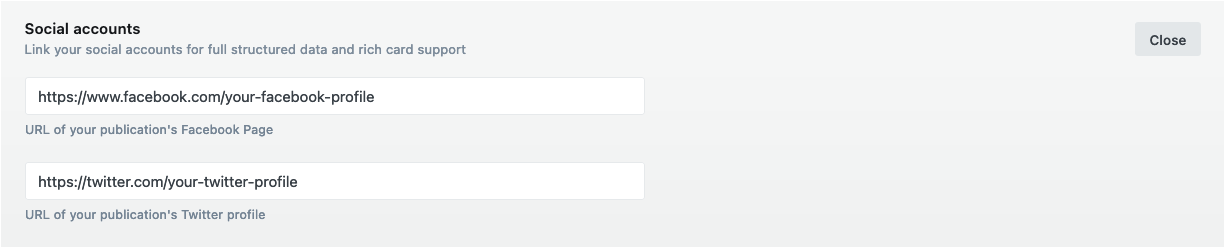
Adding Social Media Links
The social media links are displayed in the sidebar of the theme.
To add Facebook and Twitter links:
- Navigate to Settings → General in your Ghost admin.
- Click Expand next to Social accounts.
- Enter the URLs of your Facebook and Twitter profiles.
- Save changes.
All other social media links can be added manually in the social-links.hbs file located in the partials folder of the theme. For instance, if you want to add the link to your Instagram account use the following code:
<a href="https://www.instagram.com/" target="_blank" rel="noopener" aria-label="Instagram">{{> "icons/instagram"}}</a>
To see the available icons, please check the /partials/icons folder of the theme.
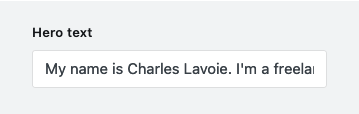
Editing Hero Section
The hero section is displayed on the home page.
To edit the hero section text:
- Navigate to Settings → Design in your Ghost admin.
- Expand the Homepage section.
- Fill the Hero text field.
- Save changes.
Adding Featured Posts
You can feature up to three of your posts. The featured posts are displayed on the homepage below the hero section.
To mark a post as featured:
- Navigate to Posts in your Ghost admin.
- Create a new post or open an existing one.
- Click on the post settings icon in the top right corner of the Ghost editor.
- Check the Feature this post box located at the bottom of the posts settings panel.
- Save changes.

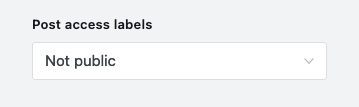
Members
Ghost members feature allows you to turn your site into a membership business with member signup, paid subscriptions and email newsletters.
If members feature is enabled on your site, the theme displays Subscribe and Sign in links in the sidebar and the Subscribe box above the footer. Both, sidebar links and subscribe box button, open the Ghost members portal.
If you wish, you can enable the labels on the posts indicating the post access level (Free or Paid). To do this:
- Navigate to Settings → Design in your Ghost admin.
- Expand the Site-wide section.
- Select the option from the Post access labels dropdown.
- Save changes.
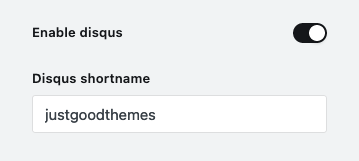
Enabling Disqus Comments
Royce comes with Disqus commenting built-in, you just need to have a Disqus account.
To enable Disqus commenting:
- Navigate to Settings → Design in your Ghost admin.
- Expand the Post section.
- Turn on Enable Disqus and add your shortname in the Disqus shortname field.
- Save changes.
Editing Copyright Information (Footer)
You can edit the copyright information via the .json translation file located in the /locales folder. Or you can edit it directly in the/partials/footer.hbs file using a code editor.
Adding Google Analytics
To add Google Analytics to your site, please follow the Google Analytics Integration guide by Ghost.
Theme Customization
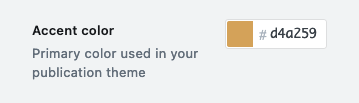
Changing Accent Color
To change the theme accent color:
- Navigate to Settings → Design in your Ghost admin.
- Expand the Brand section.
- Choose your color.
- Save changes.
Changing Posts Per Page Number
You can set the number of post displayed per page in the package.json file of the theme. The default post number is set to 8:
"config": {
    "posts_per_page": 8
}
Theme Translation
The Royce theme is ready for translations. You can find the default file in the locales folder. Copy locales/en.json to locales/[language_code].json where “language_code” must be replaced with a valid code. You can edit the renamed translation file with any plain text editor.
Even if your site is in English, you can customize any theme texts by simply editing the default English file ( locales/en.json ), without modifying the theme templates.
You can find more information on how to translate the theme in Ghost documentation.
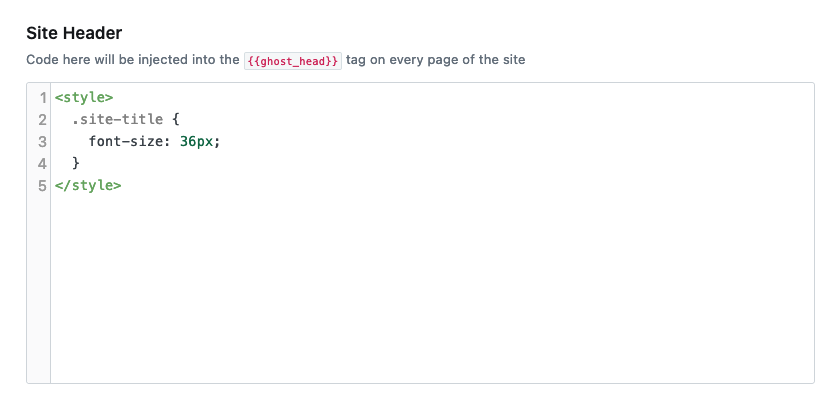
Adjusting Style
To customize the theme style, use the Code Injection tool and place your CSS rules in the Site Header field.
For instance, to adjust the site title size:
- Navigate to Settings → Code Injection in your Ghost admin.
- Add the necessary CSS rules to the Site headerfield.
- Save changes.
Routes
All of Ghost’s routing configuration is defined in content/settings/routes.yaml - which you can edit directly, but you can also upload/download this file from within your Ghost admin panel under Settings » Labs.
The routes.yaml file used for Poudeglac theme:
routes:
  /:
    template: startpage
    data: page.ecotourism
collections:
  /blog/:
    permalink: /{slug}/
    template: index

taxonomies:
  tag: /tag/{slug}/
  author: /author/{slug}/
If you edit the file manually, you’ll need to restart Ghost to see the changes, but if you upload the file in admin then your routes will automatically be updated right away.
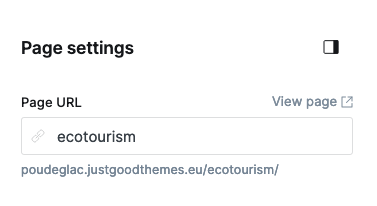
Creating Home Page
To create a custom home page for the Poudeglac site, you need to create a new page and specify ecotourism slug in the Page URL field:
Adjusting Subtitle For Page
To create center aligned subtitle on the page, you need to add an HTML block on the page:

And use custom HTML code with post-subtitle class:
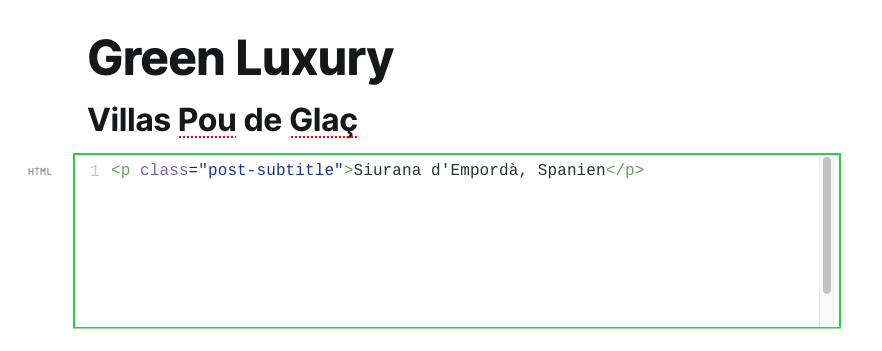
Subtitle code example:
<p class="post-subtitle">Siurana d'Empordà, Spanien</p>